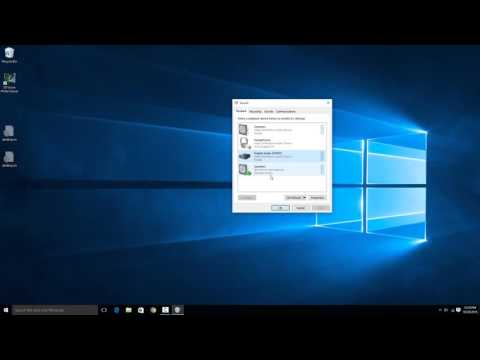
First, right-click on the audio option at the bottom right corner and then select the playback devices option.
Next, a window will appear listing all the output devices available for your computer. In the video list I have three options available, the headphone jack on my desk, the optical audio out on my desk (SPDIF) and the headphone out on the microphone. Your list will likely have different options, such as HDMI output or any USB options you may have.
After selecting the device from the list you want to use, choose the Set as default option at the bottom.
After that, you will notice all active audio and any new audio (such as movies and iTunes) will switch to the new default device.
If you want to go back to your headphones or HDMI, simply choose that device again and choose the option set to default.
Check out my Facebook at: https://www.facebook.com/pages/All-How-2s/198429346974010
or my twitter: https://twitter.com/AllHow2s
Or my website where I have lots of other great tutorials (like how to take a screenshot or how to get the Start button back in Windows 8): http://www.allhow2s.com
Please take the opportunity to connect and share this video with your friends and family if you find it useful.
No Comments