Don't forget to check out our site http://howtech.tv/ for more free how-to videos!
http://youtube.com/ithowtovids – our stream
http://www.facebook.com/howtechtv – join us on Facebook
https://plus.google.com/103440382717658277879 – our group in Google
System Protection is basically a Windows 7 feature that creates restore points of specific partitions of your hard drive. This is a feature enabled by default in Windows.
If you want to enable system protection for a specific partition or hard drive, follow this step-by-step tutorial. In this detailed guide, we will teach you how to enable system protection.
Step 1 – Go to System Protection
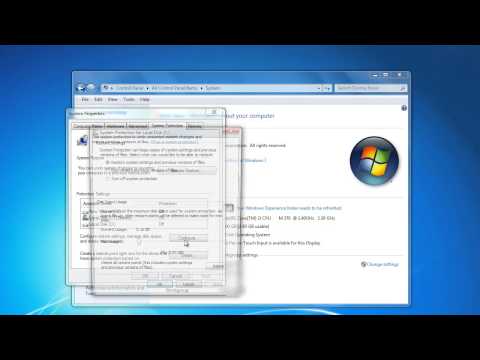
So let's start with our tutorial on how to enable system protection. First of all, we will have to access the System window. You can do this through the control panel. You can also access it by going to the Start menu, right-clicking on the computer and choosing the Properties option.
There, click on the System Protection option located in the panel on the left side of the window.
Step 2: Choose Hard Drive
This will open the system properties window. Under the System Protection tab, click the partition or hard drive on which you want to enable system protection. Once you're done, click the /"Configure/" button.
Step 3: Set restore settings
In this window you can configure system protection options for the selected drive. For example, you can allow the feature to create restore points for system settings and previous versions of files and directories.
You can also choose to restore only previous versions of files and directories or disable both features.
With that done, move the slider next to the "Maximum Usage" option to set the maximum disk space usage that will be used by System Protection on the selected hard drive or partition.
Once done, just click /"OK/" and that's it. System protection is now enabled on the selected partition. You can also do the same for other partitions and hard drives on your computer.
Please take the opportunity to connect and share this video with your friends and family if you find it useful.
No Comments