This problem may occur after updating new Windows features, installing a program or driver, system disk corruption or missing boot files in Dell, Lenovo, Toshiba, Acer, Asus, Hp , MSI or any other laptop or desktop computer.
Blue screen with this error message: Your computer has encountered a problem and needs to restart.
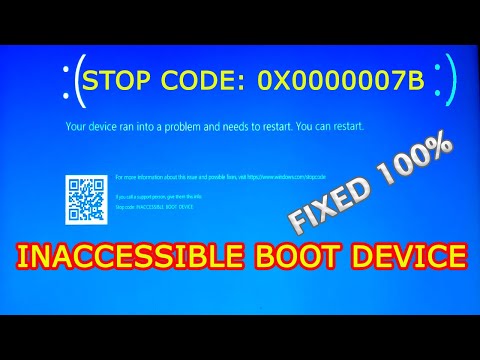
Stop inaccessible boot device by code.
IMPORTANT: SEE HOW TO CORRECTLY IDENTIFY THE EFI OR BOOT PARTITION:
https://youtu.be/tYUBiWO0P9o
This video is about fixing Windows 10 boot device inaccessible by CMD after system update or apps installation. However, if the problem occurred after updating BIOS, resetting or cloning SSD, watch this video to see how to fix this problem:
https://youtu.be/HyqmvsLBMS4
Fix Inaccessible Boot Device Windows 10 Stop Code
inaccessible boot device reboot loop
Boot device inaccessible after Windows or graphics card update
How to Fix Automatic Repair Loop in Windows 10
How to Create a Boot Repair Disk to Fix Blue Screen Boot Loop Automatically:
https://youtu.be/8mZ3pjkbXK0
Video content:
The first parts: How to access advanced recovery options from the system boot menu or via Windows installation media like a CD, DVD or USB drive.
The second parts: Methods to fix inaccessible boot device issue, including:
1: Autostart Repair
2: Uninstall the update
3: System Restore
4: Removing Recent Updates
5: Restore health
6: Checking and fixing disk errors automatically
7: Repair missing or corrupted system files using SFC
8: Repair Boot MPR, sector and configuration using Bootrec
9: Copy your files from a dead computer to a USB using CMD
10: Copy files to USB using Notepad
11: Reset PC keeping all files and folders
– Opening the Advanced option without installation media:
A. Shut down the computer completely
B. Turn it back on
C. When the Windows logo appears with a circle of dots, press and hold the power key for 8 seconds or until the device turns off completely.
D. Repeat the previous two steps until /"Preparing for automatic repair/" appears.
Command lines:
4th:
Remove recently installed or pending Windows updates using CMD:
dism /image:C:// /get-packages
dism /image:c:// /remove-package /packagename:
5th:
(Applicable for Windows 10, Windows 8.1, Windows 8, Windows Server 2012 R2 or Windows Server 2012)
Restore the system state with or without Windows installation media:
Dism /Image:C:// /Cleanup-Image /ScanHealth
You can also run this command to check if the system is healthy, repairable, or non-repairable.
Dism /Image:C:// /Cleanup-Image /CheckHealth
Dism /Image:C:// /Cleanup-Image /RestoreHealth
Restoring system health using Windows installation media.
DISM /Image:C:// /Cleanup-Image /RestoreHealth /Source:WIM:D://Sources//install.wim:1 /LimitAccess
If the previous command failed, use these two commands instead:
MD C://Scratch
DISM /Image:C:// /Cleanup-Image /RestoreHealth /Source:WIM:D://Sources//install.wim:1 /ScratchDir:C://Scratch
6th:
Automatic disk error checking and correction.
Type :
CHKDSK /R
Or
CHKDSK C: /F /R
Or
CHKDSK C: /F /R /X
7th:
In Windows 10, Windows 8.1, or Windows 8, run DISM with the restorehealth command before the SFC command. In Windows 7 or Windows Vista, run SFC directly.
Dism /Image:C:// /Cleanup-Image /RestoreHealth
Type the displayed command and press Enter.
SFC/Scannow
You will receive one of the following messages:
– Windows Resource Protection found no integrity violations.
– Windows Resource Protection found corrupted files and successfully repaired them.
– Windows Resource Protection detected corrupted files but was unable to repair some of them.
– Windows Resource Protection could not perform the requested operation.
This means that the SFC tool has failed and you need to run the System File Checker scan in safe mode.
How to boot into safe mode from WIM.
Type these command lines:
bcdedit /set {default} safeboot minimal
bcdedit /set {safebootalternateshell default yes
Restart Windows and it will boot into Safe Mode:
To disable safe mode boot:
bcdedit /deletevalue {current} secure boot
8th:
Repair or rebuild boot files using Bootrec.exe:
bootrec /rebuildbcd
bootrec/fixmbr
bootrec/fixboot
If bootrec /fixboot failed with “access is denied” error:
Type:
bootsect/nt60 SYS
bootrec/fixboot
Or use:
bcdedit /export C://BCD_Backup
vs :
CD boot
attribute bcd -s -h -r
ren c://boot//bcd bcd.old
bootrec/RebuildBcd
Watch this video for more details:
https://youtu.be/nR5aWZsowzI
10th:
Type:
Disc part
List of discs
is UEFI.
Disc salt 0
Flight list
Salt theft?
assign the letterV:
Exit
V:
format V: /FS:FAT32
on Windows 10 1709 and earlier versions:
MD //EFI//Microsoft//Boot
cd /d V://EFI//Microsoft//Boot//
bootrec/FixBoot
bcdboot c://Windows /l en-us /s V: /f All
under Windows 10 1709 or newer (1803, 1809, 1903, 1909, 2004), etc. :
bcdboot C://windows /s V: /f UEFI
Please take the opportunity to connect and share this video with your friends and family if you find it useful.
No Comments