How to remove Windows activation notifications and watermark using services
You can temporarily remove Windows activation notifications and watermark from an unactivated version of Windows. You can do this by changing a value in the Services menu or by editing the Windows registry. Keep in mind that the only way to permanently remove Windows activation notifications is to activate Windows.
1-Open Start. Click the Windows logo in the lower left corner of the screen. The Start menu will open.
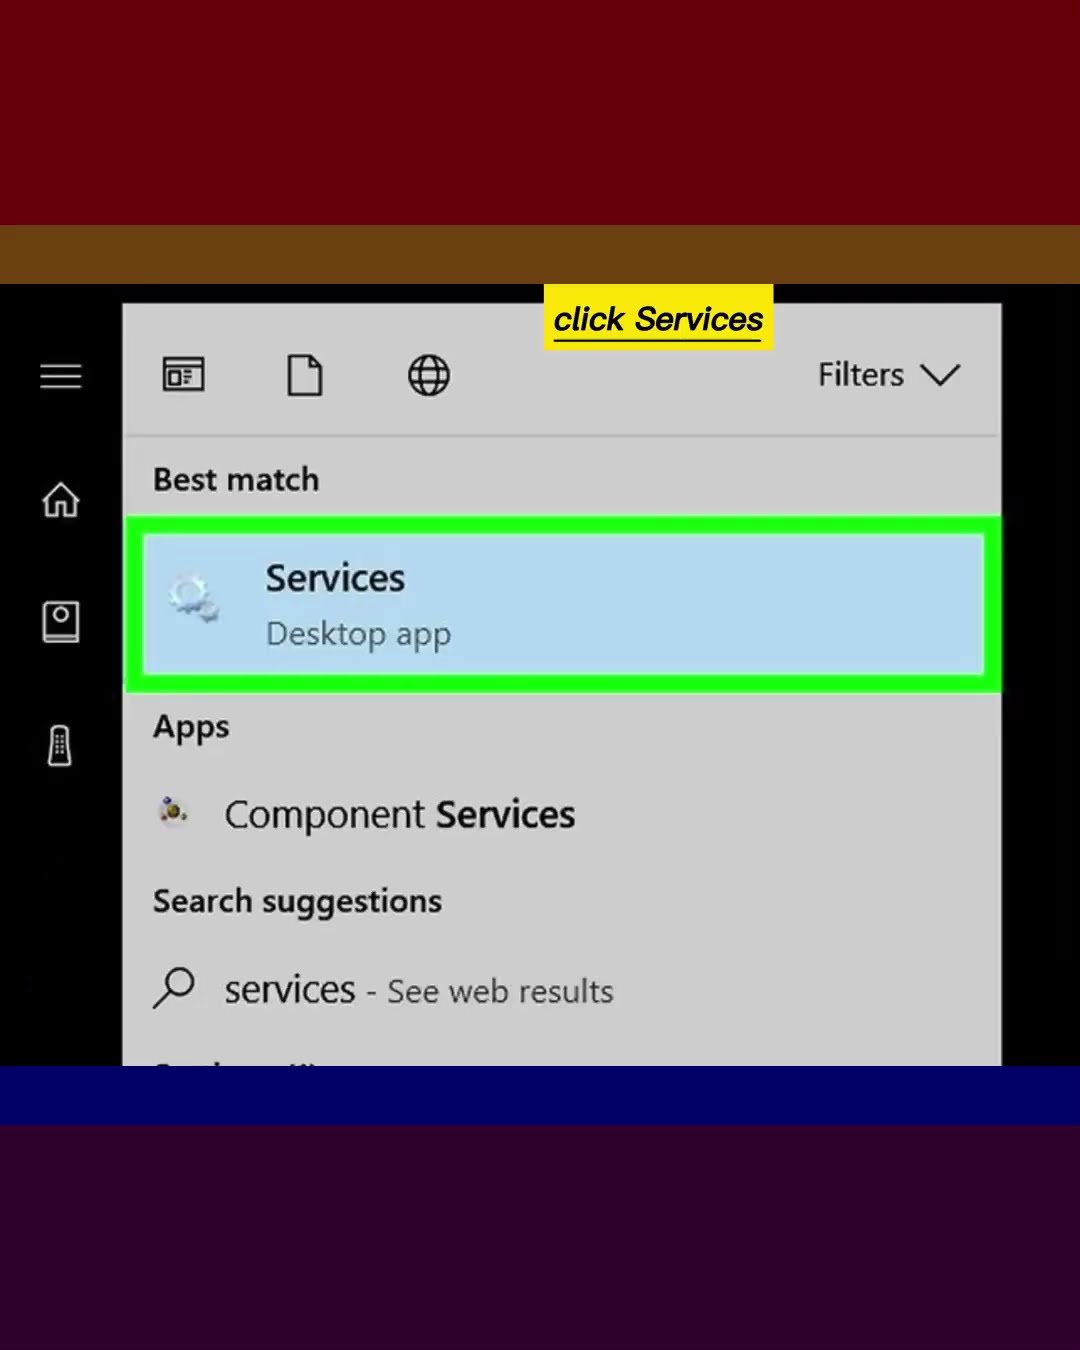
2-Type services in Start. This searches for the Services application, which allows you to control which system processes are running.
3-Click on Services. It's a gear icon at the top of the Start window. The Services window will open.
4-Scroll down and click Software Protection. You will find this service in the /"S/" section of the window.
On some computers this will say sppsvc instead.
5-Click on the /"Properties/" icon. It's the folder icon just below the View tab in the upper left corner of the window. A new window will open.
6-Click on Stop. This option is in the middle left of the window. This will cause the software protection service to stop.
7-Click OK. It's at the bottom of the window. Your activation will remain disabled until you restart or update your computer, at which point you will need to disable it again.
#windows #windows10 #activation #service #notification #watermark #unactivated #services #windowsactivation #windowsactivations #notifications #notificationson #notifications #notifications️ #watermark #howtoremove
1-Open Start. Click the Windows logo in the lower left corner of the screen. The Start menu will open.
2-Type services in Start. This searches for the Services application, which allows you to control which system processes are running.
3-Click on Services. It's a gear icon at the top of the Start window. The Services window will open.
4-Scroll down and click Software Protection. You will find this service in the /"S/" section of the window.
On some computers this will say sppsvc instead.
5-Click on the /"Properties/" icon. It's the folder icon just below the View tab in the upper left corner of the window. A new window will open.
6-Click on Stop. This option is in the middle left of the window. This will cause the software protection service to stop.
7-Click OK. It's at the bottom of the window. Your activation will remain disabled until you restart or update your computer, at which point you will need to disable it again.
#windows #windows10 #activation #service #notification #watermark #unactivated #services #windowsactivation #windowsactivations #notifications #notificationson #notifications #notifications️ #watermark #howtoremove
Please take the opportunity to connect and share this video with your friends and family if you find it useful.
No Comments